Showing posts with label Teabag Treasures. Show all posts

Tuesday, 26 November 2013

Tutorial Tuesday - Tea Bag Treasure Box

Tutorial Tuesday

Where will your imagination take you?

It is surprising what you can do with an empty box an a bit of imagination.  As part of the recycled project on Saturday I shared with you the Teabag Treasure Boxes I had made, from the empty box once it had finished, here is the selection that I had made previously.
Selection of Tea boxes made into treasure boxes

Today I will be showing you how you can decorate your own box using a few simple techniques.  What you will need:
An empty tea box (or any box you have to hand, paper of choice, gesso or paint, stamps, embellishments of choice and imagination! 


Starting off with a box

Taking a box of your choice - this is one of my favorite teas and I do go through quite a few - it is spiced tea with a blend of ginger, cardamon, black pepper (yes) and a range of other things, it is absolutely delicious with some sugar and rice milk.  It is similar to Chai, but a bit more spicy, but that is for another post...

Cover your box in your paper of choice, this will help make it more sturdy.  Here I have used a brown paper bag.  I spritzed it with water which made it easier to scrunched it up which will add texture to the box.

As I applied each piece I have covered it pva glue and then allowed it to dry.
Once covered and dried your on the home stretch!

The box sets quite hard, I decided to keep my box open and then I painted it with gesso, allowing some of the colour of the paper to show through.

Add an encouraging word with lettering

I stuck on some letting - the word 'Create' and on the inside of the lid using handmade stamps I stamped a heart and added stamped flowers around the outside of the box..
Home made stamps used in decoration

I applied glue from a hot glue gun around the edges and around the heart.


To finish off I added some goldfinger metalic paste to the edging of the box and around the glue and it gives it a worn grungy look.

I attached one of the 'teabags' from the teabag treasure tutorial post I did last week.  You can cover your box with pva glue to seal it and then your ready to go and use it


I look forward to sharing next weeks project with you.

Saturday, 23 November 2013

Recycled Projects - Teabag Treasure Boxes

What do you do with the boxes from the teabags you recycle?

You would have got a glimpse last week of one of the boxes that had been altered below when I showed you the teabag treasures post 


There are some great ways that you can decorate the boxes and here are a few suggestions...

I wanted to create a home for the teabag treasures and what better place than the boxes they came from in the first place. Each box came to life with its own feel, not quite having an idea of how I wanted them to look,


I decided to spend time playing.  The one below is covered in quinoa which gives it a lovely texture and it has flowers hanging from the lid of the box.

This box had initially been covered with a gold textured paper, and covered in gesso to give it an old feel, then covered in some goldfinger paste.  The box also has some home made washi tape around the middle.


 This box was covered in sequins and decorated paper

All in all the boxes came out quite pretty and is a really easy project


I hope you have a blessed weekend, and allow your creativity to push back the boundaries in order to allow yourself to really soar!

Come back on Tuesday to see how I made the Teabag boxes in Tutorial Tuesday. Do share creative ways in which you have used recycled materials and leave a comment below.

Tuesday, 19 November 2013

Tutorial Tuesdays - Teabag Treasures

Tutorial Tuesday

Teabag Treasures
On Saturday I showed you my teabag treasures HERE.  Today I will be showing you how to make one of these decorated teabags to make your own treasures.  They are pretty straight forward.

Select whatever type of teabags you may have.  There may be some that got forgotten in the back of your cupboards that you can use.

Here are some of the tools that I used for this project.


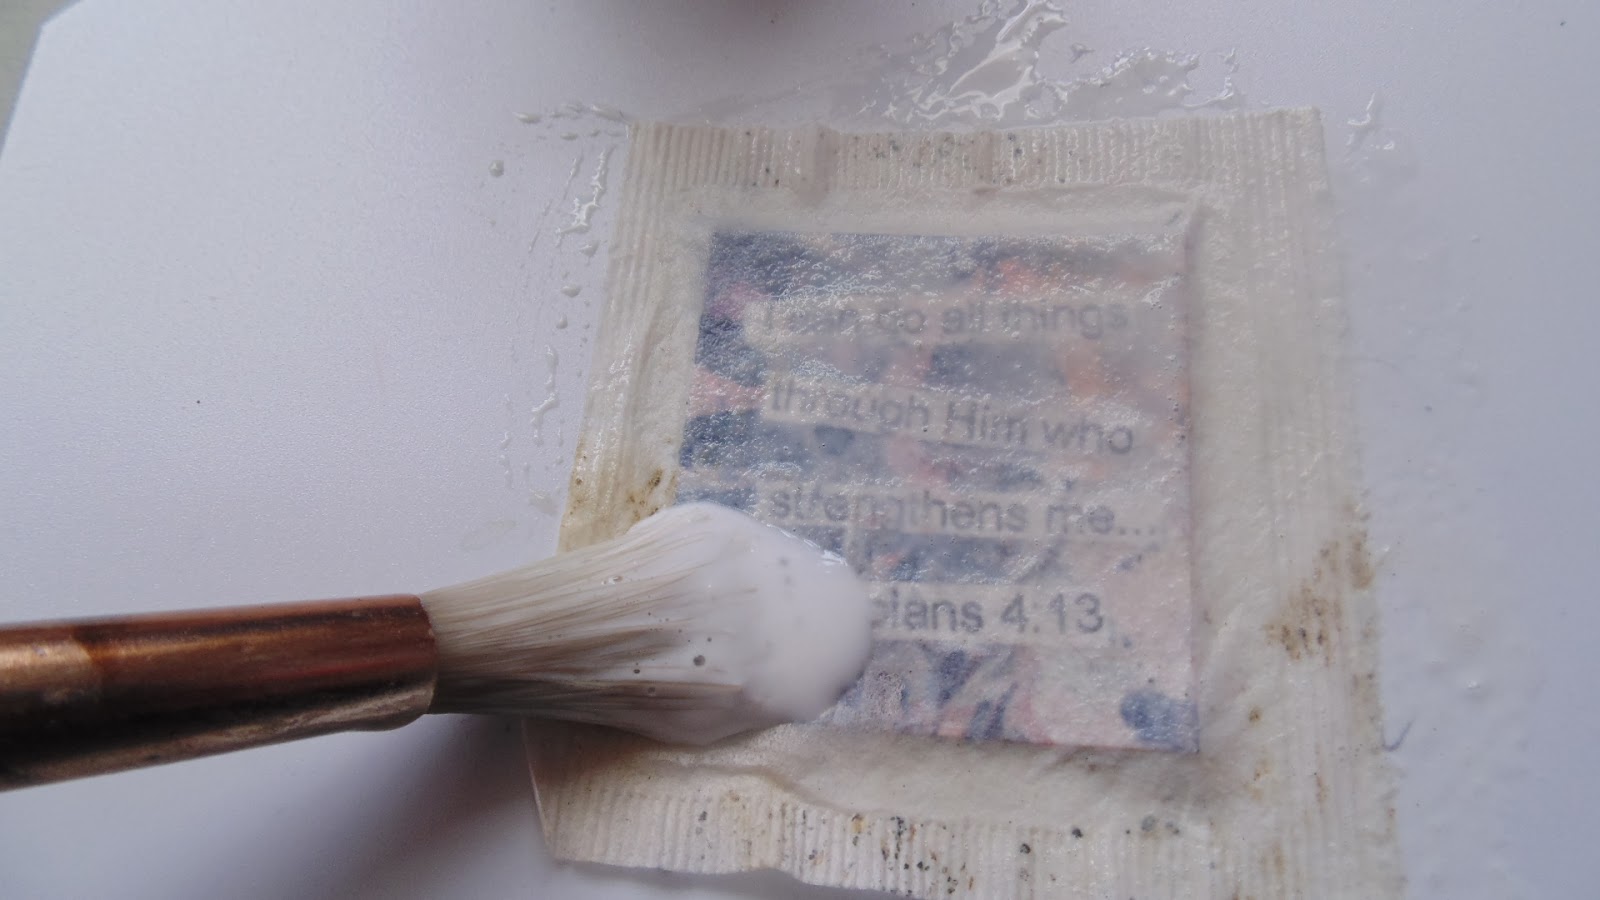
Take the teabags and make a slit on one side and then cut along the top of the bag. Pour out the contents of the teabag.

Select from a range of things that you might have already or that you want to make, and encouraging word, an image that can go inside the bag.


When you are satisfied with the contents that you have cover the bag in pva glue and coat the back as well.  Allow to dry.  The glue helps the teabag to stiffen and has a leathery type feel.

For the frame of the bag I used quinoa and put a beading of glue then sprinkled the quinoa on to cover all of the glue.


Allow to dry and then add any additional embellishments 


You can either leave the edges as they are or you could put a coat of paint of your choice, alternatively you can rub 'goldfinger metallic finish' to give it a vintage look.

Teabag Treasures
Once complete give it a final coat of pva glue on the front and the back which will act as a sealant.  You could go on to use these bags in your journals, on cards as a gift.

I am looking forward to sharing next weeks recycled project.


Saturday, 16 November 2013

Recycled Projects - Tea Bag Treasures


I am really excited about these as they came out better than expected.  I called them Teabag treasures.

Having a clear out of my cupboards I found box of teabags that were passed their prime.  I had thought of using the leaves for dying paper in my journal and as I emptied each bag I thought that they would make mini canvases that you could put special messages on.

 Hidden messages, or treasures that could be encouraging and uplifting.
 It reminded me of those people who would find hidden messages in the leaves of the loose tea at the bottom of the cup
 On each bag I placed an encouraging message, a reminder that there is more that the current life we live...
 We only have to be brave enough and get out of our comfort zone and see the special qualities that we possess!
Teabag treasures, what are you doing with the treasures that lay hidden inside of you?


I hope you have a blessed weekend, and allow your creativity to push back the boundaries in order to allow yourself to really soar!

Come back on Tuesday to see how I made the Teabag treasures in Tutorial Tuesday. Do share creative ways in which you have used recycled materials and leave a comment below.